Include Javascript files safely

Sometimes, you might accidently exclude javascript files because you were to use the method below to include javascript files.

<script language="javascript" src="Scripts/jquery-1.4.1.min.js" type="text/javascript" ></script>

Actually this method works most of the time. But if your project goes complicated and more modules are required to develop and you started to use Folder to group your pages. Here I use 3 child folders for the simulation.

image

Let check what will happen to the javascript file that I wish to include in NewPage.aspx.

image

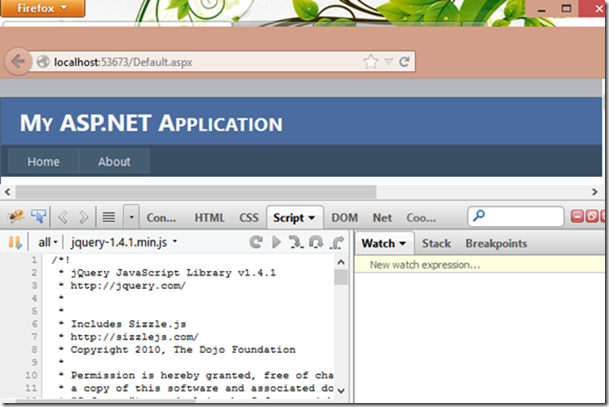
When I inspect the javascript files by using FireBug, I cannot see it from the Script listing.

image

But it is available in Default.aspx.

To overcome this, I prefer to use code behind to include javascript files. Below is the code that I placed in the master page for this purpose.

        protected void Page_PreRender(object sender, EventArgs e)
        {
            System.Web.UI.HtmlControls.HtmlGenericControl script;

            script = new System.Web.UI.HtmlControls.HtmlGenericControl("script");
            script.Attributes["type"] = "text/javascript";
            script.Attributes["src"] = Page.ResolveUrl("~/Scripts/jquery-1.4.1.min.js?v=1");
            Page.Header.Controls.Add(script);
        }

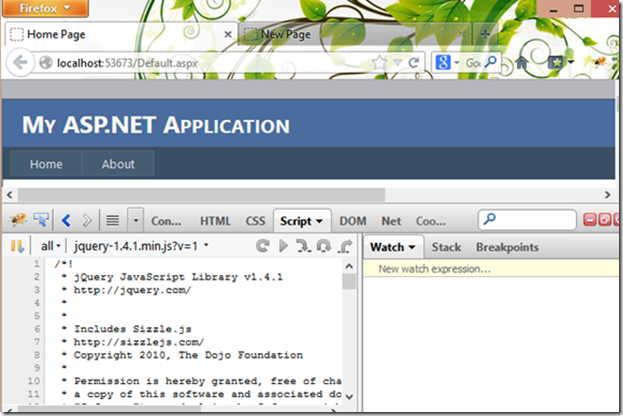
As you expected, now both pages can have javascript file included.

image

image

script.Attributes["src"] = Page.ResolveUrl("~/Scripts/jquery-1.4.1.min.js?v=1");

You might curious why I included a query string at the end of the javascript file name. This is because during the development, javascript files change frequently. And my preferred browser – Firefox comes with a feature which will cache the javascript files. Most probably this is to has a better performance but it make the new version of my javascript cannot be render out. So this workaround allow me to trick the browser to always get the file from server whenever I change the “version” (v=1) number.

Hope this sharing make your javascript files render out safely.

Download Attachment

A simple in-page pop up panel.

I prepared 2 sample pages to show on how to design your own pop up panel by using CSS, Javascript and Code Behind.

First, let see how a pop up panel look like at html.

popupBG

  • A div element cover the whole page with semi transparent or solid colour background.

popup

  • Another div element as the container of pop up panel at the centre of page.

By understand this, you can easily design your own pop up panel.

        <div id="SemiTransparentBG" class="fadePanel semiTransparent">
        </div>
        <div id="TransparentBG" class="fadePanel transparent">
        </div>
        <div id="PopUp" class="Popup">
            <div class="InnerPopup">
                <p>Here is the body of a pop up element.</p>
                <p id="PopUpBody"></p>
                <p>
                    <input type="button" id="Close" value="Close" onclick="ClosePopUp();" />
                </p>
            </div>
        </div>

Here, I prepared 3 div elements with different CSS classes. So that I can easily form 3 type of pop up panel by using the combination of them. Which are :

  • Modal PopUp with Semi Transparent Background
  • Modal PopUp with Transparent Background
  • PopUp without Background

CSS play a very important role to create the pop up effect at web page. Let me describe some of the important CSS classes that you can find in this sample.

.fadePanel
{
    position: fixed;
    width: 100%;
    height: 100%;
    top: 0px;
    left: 0px;
    z-index: 9999;
}

To form a full screen background, you have to use 100% for width and height, set 0px to top and left. Position = fixed so that it will not move event the page come with scroll bar. z-index = 9999 so that it will appeared on top of the others.

.Popup
{
    position: fixed;
    margin:0px 25%;
    z-index: 99999;
}

This CSS class applied to the outer of the pop up container. Position = fixed so that it will not move event the page come with scroll bar. Higher z-index so that it will appeared on top of the background panel. margin of left and right are actually adjustable according to the width of the pop up container. For this page, I’m using 25%.

.InnerPopup
{
    margin: auto;
    min-width: 380px;
    min-height: 200px;
    background-color: #CEC9C9;
    padding: 30px;
    -moz-border-radius-topright: 50px;
    border-top-right-radius: 50px;
    -moz-border-radius-topleft: 50px;
    border-top-left-radius: 50px;
    -moz-border-radius-bottomright: 50px;
    border-bottom-right-radius: 50px;
    -moz-border-radius-bottomleft: 50px;
    border-bottom-left-radius: 50px;
    border: 1px solid Black;
}

This CSS class applied to the pop up container. The important CSS are width and height for the pop up. The rest can be ignored if you don’t want the cosmetic effects.

I also created few Javascript functions for this page to handle the show and hide of the pop up panel. They are pretty straight forward by using jQuery.

        <script type="text/javascript">
            $(document).ready(function () {
                //Hide all pop up related elements during page ready.
                ClosePopUp();
            });

            function ShowModalPopUp_SemiTransparentBG() {
                $("#SemiTransparentBG").show('slow');
                $("#PopUp").show('slow');
                $("#PopUpBody")[0].innerHTML = "This popup brings a visual effect that tell user, they are not allow to click the background controls until this popup being closed.";
            };

            function ShowModalPopUp_TransparentBG() {
                $("#TransparentBG").show('slow');
                $("#PopUp").show('slow');
                $("#PopUpBody")[0].innerHTML = "This popup <b>doesn't</b> brings a visual effect that tell user, they are not allow to click the background controls until this popup closed. </br> </br> <b>In fact</b>, they cannot click the background controls. ^^";
            };

            function ShowPopUp_NoBG() {
                $("#PopUp").show('slow');
                $("#PopUpBody")[0].innerHTML = "This popup will not block access to any visible background controls.";
            };

            function ClosePopUp() {
                $("#SemiTransparentBG").hide('slow');
                $("#TransparentBG").hide('slow');
                $("#PopUp").hide('slow');
            };
        </script>

If you don’t like to code in Javascript, I has prepared another page for you as reference. There are nothing different by comparing the CSS classes. The only different is it isn’t using any Javascript but C# (VB.NET also can).

        protected void Page_Load(object sender, EventArgs e)
        {
            if (!Page.IsPostBack)
                HidePopUp();
        }

        private void HidePopUp()
        {
            SemiTransparentBG.Visible = false;
            TransparentBG.Visible = false;
            PopUp.Visible = false;
        }

        protected void Close_Click(object sender, EventArgs e)
        {
            HidePopUp();
        }

        protected void PopUp_NoBG_Click(object sender, EventArgs e)
        {
            PopUp.Visible = true;
            PopUpBody.InnerText = "This popup will not block access to any visible background controls.";
        }

        protected void ModalPopUp_TransparentBG_Click(object sender, EventArgs e)
        {
            TransparentBG.Visible = true;
            PopUp.Visible = true;
            PopUpBody.InnerHtml = "This popup <b>doesn't</b> brings a visual effect that tell user, they are not allow to click the background controls until this popup closed. </br> </br> <b>In fact</b>, they cannot click the background controls. ^^";
        }

        protected void ModalPopUp_SemiTransparentBG_Click(object sender, EventArgs e)
        {
            SemiTransparentBG.Visible = true;
            PopUp.Visible = true;
            PopUpBody.InnerText = "This popup brings a visual effect that tell user, they are not allow to click the background controls until this popup being closed.";
        }

Download Attachment

This and That, and Javascript

WP_000276

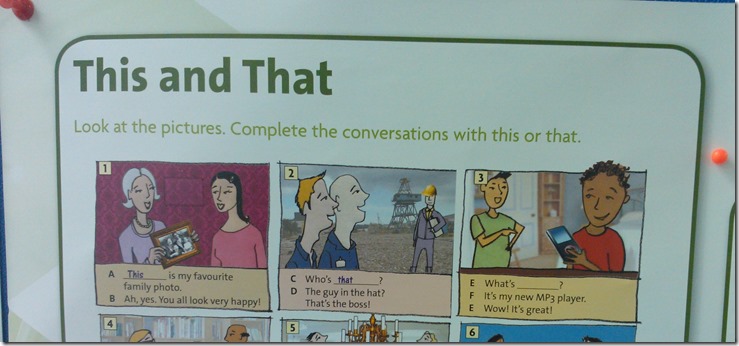
Recently, I saw this in a class room and it remind me on how I use it at Javascript.

To overcome some of the requirements, we have to create client side scripting in an object oriented way. For an example, client side scripting for a custom server control. Anyways, I’m not going to show on how to create a custom server control now. Perhaps, at the other day. Smile

I has created a demo page for this topic. I design a Javascript class for this page with 3 public functions(Container, Push and Pop) and 1 public property(SequenceId).

function Demo() {
    var that = this;
    this.SequenceId = 1;

    Demo.prototype.Container = function () {
        return $(".Container");
    };

    Demo.prototype.Push = function () {
        this.Container().append("<div class='Item'>" + this.SequenceId + "</>");
        this.SequenceId += 1;
    };

    Demo.prototype.Pop = function () {
        if (this.Container().children().length > 0) {
            this.Container().children().first().remove();
        }
    };

    function AddHandler() {
        $("#Add").click(function (s, e) {
            that.Push();
        });

        $("#Remove").click(function (s, e) {
            that.Pop();
        });
    }

    AddHandler();
}

You can see I created a variable that and assigned it with this object. (At Javascript, this represent the current instant of the object.) This is because I’m going to re-use the functions of current instant at function body.

Let me explain this Javascript class.

  • function AddHandler()  : I use this private method to register all event handler of controls so that I can have no Javascript at my page. At this function body, I’m going to use Push and Pop functions which were created as public function. I cannot use this.Push or this.Pop because they will actually point to nothing since the this object is actually represent the button control.ThisnThat
  • this.SequenceId : This is a property of this class object. I use it to store the current running number. It will print on every item.
  • Demo.prototype.Push : This is a public function so the this object in this function body is actually represent the instant of the class.ThisnThat2

To know more about this, you can refer to Douglas Crockford’s Private Members in JavaScript.

Download Attachment

Multiple Validation Groups

Sometimes, it is a requirement to has separate validation groups to be trigged for an action. To meet the requirement, you can simply write some javascripts to perform validation according to the specific condition.

Example:

        function IsSearchInputValidated() {
            return (ClientValidate("Search") & ClientValidate("AdvancedSearch"));
        }

or

        function IsSearchInputValidated() {
            return (ClientValidate("Search") && ClientValidate("AdvancedSearch"));
        }

If you were to write the code in these way, you will get only 1 of the validation groups message displayed. ^^

To overcome this, we can create a helper function to make sure all validation groups being validated at one shot.

        function ClientValidate(groupName) {
            var result = new Boolean(1);
            var g = groupName.split(";");
            var html = new String();

            for (var i = 0; i < g.length; i++) {
                if (!Page_ClientValidate(g[i])) {//not valid.
                    result = false;
                    if (typeof (Page_ValidationSummaries) != "undefined") {
                        for (var j = 0; j < Page_ValidationSummaries.length; j++) {
                            if (Page_ValidationSummaries[j].validationGroup == g[i]) {
                                //Use 'html' variable to keep the previous validation summaries and display together 
                                //with the current validation summaries.
                                html += Page_ValidationSummaries[j].innerHTML;
                                break;
                            }
                        }
                    }
                }
            }

            if (result == false) {
                //Clear others summary and display the validation summarries.
                if (typeof (Page_ValidationSummaries) != "undefined") {
                    for (var i = 0; i < Page_ValidationSummaries.length; i++) {
                        for (var j = 0; j < g.length; j++) {
                            if (Page_ValidationSummaries[i].validationGroup == g[j]) {
                                Page_ValidationSummaries[i].innerHTML = html;
                                Page_ValidationSummaries[i].style.display = "inline"; //"none"; "inline";
                            }
                            else {
                                Page_ValidationSummaries[i].innerHTML = "";
                            }
                        }
                    }
                }
            }

            return result;
        };

And the code to consume it will look like this:

        function IsSearchInputValidated() {

            var option = document.getElementById("AdvancedSearch");

            if (option.checked == true) {
                return ClientValidate("Search;AdvancedSearch");
            }
            else {
                return ClientValidate("Search");
            }
        }

See, now we will have both validation groups message displayed.

image

Download Attachment